How to Install on Windows
Pre-requisites
This installation guide assumes that you have already set up a Windows VM on Azure and are ready to install the agent.
Before installing the agent on a Windows VM, ensure you have the latest version of PowerShell installed. Check out Installing PowerShell on Windows for more information.
You will need administrative privileges to install the agent.
Installing the Agent
Follow along with the below instructions to install and configure the Loome Agent on an Azure Windows VM.
Complete the Agent Configuration Wizard
On the agent page, click on Windows from the tabs on the top of the page.
This is the environment where the agent will be deployed.
Agent Details for All Platforms
Provide a name for the agent. This should be unique and easily identifies this agent. It may only contain letters, numbers, dashes, and dots.
Choose an Expiry Date. You can also click on the calendar on the right of the field to choose from a date selector.
Provide a description for the agent.
On the next page, choose to add networking configuration:
- You can choose to add your own client IPv4 address at the top-right of the table.
- You can also add firewall rules. You can add a range of IPv4 addresses.
- Provide a name for the firewall rule, and then choose a start and end IPv4 address.
If applied, the agent can be accessed from these IPv4 addresses.
Next, review your agent details and then click on Create Agent to create the agent.
Follow the instructions on the next screen to install and configure your agent on your selected environment.
You can then follow the prompts in the installation wizard for your chosen platform.
The next example is in Windows, and the following sections contain more information for other platforms.
Click on the Download Agent Installer button to download the PowerShell installation script.
Use the copy button to copy the PowerShell command that will execute the installation script.
Silent Install
You can also use the script with the silent install option. It will proceed with the agent installation by selecting the default options for the prompts. It will choose “Y” for confirming the installation of the agent, “N” for installing SnowSQL (for use with Snowflake Cloud Data Warehouse), and “N” for using Microsoft Genomics.
To use silent install, select the checkbox beneath the install script.
Copy the script and paste it into your installation window, Administrator PowerShell, and run the script.
Also, take note of the installation location and service name for future reference. Administrators can later find this when they edit the agent.
Installing on Windows
Open PowerShell as an Administrator in the folder that contains the new Loome agent installer.
Copy and run the command from Loome in this PowerShell Window. (If you have selected silent install, this will be reflected in the script.)
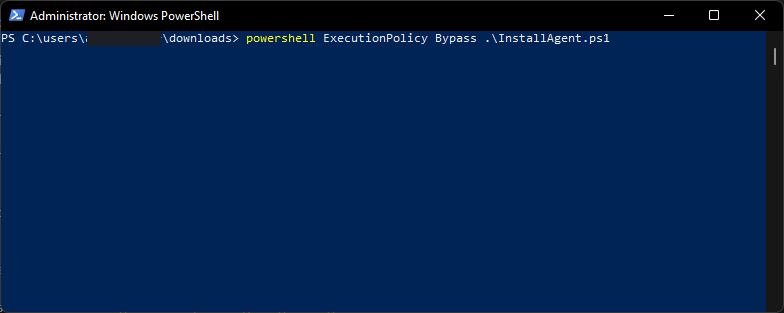
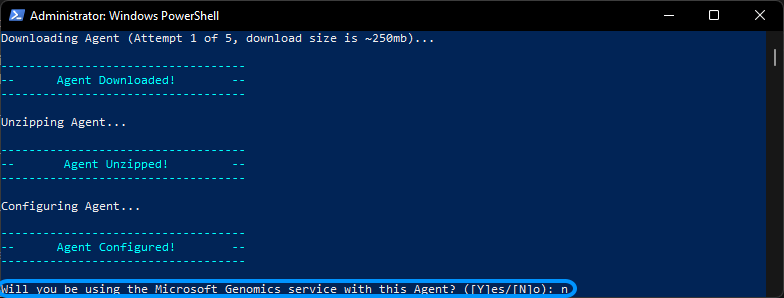
The agent installer will pause for a few minutes while it downloads the agent.
If prompted to install SnowSQL or Microsoft Genomics, enter N and press enter. These feature are not required for Loome Assist, they are used by other Loome modules.
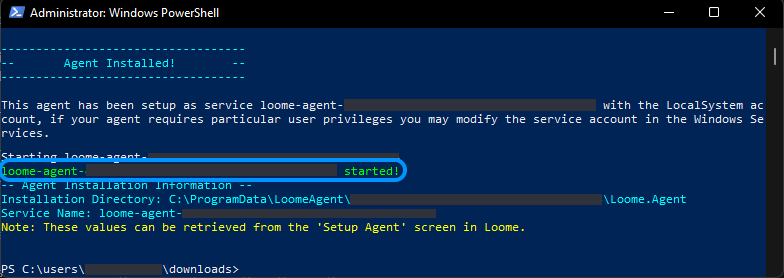
Once completed, you should see a green message indicating that the service has started. You will also see the agent installation location and service name, take note of these for your own reference.
Completing Additional Configuration in the Azure Portal
Before we can use the Agent, we need to complete additional configuration on the Azure Windows VM containing the Agent.
We will configure the Agent with a Managed System Identity, and then provide it permissions to provision and manage resources within the Subscription.
Browse to portal.azure.com and locate the Resource Group where you provisioned the Azure VM and then click on it.
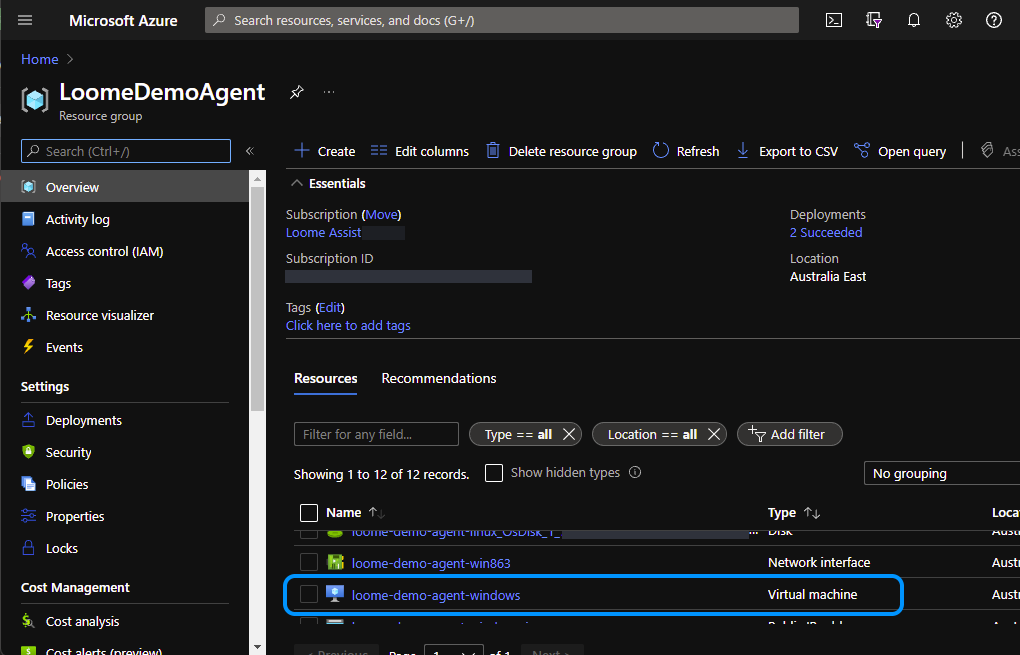
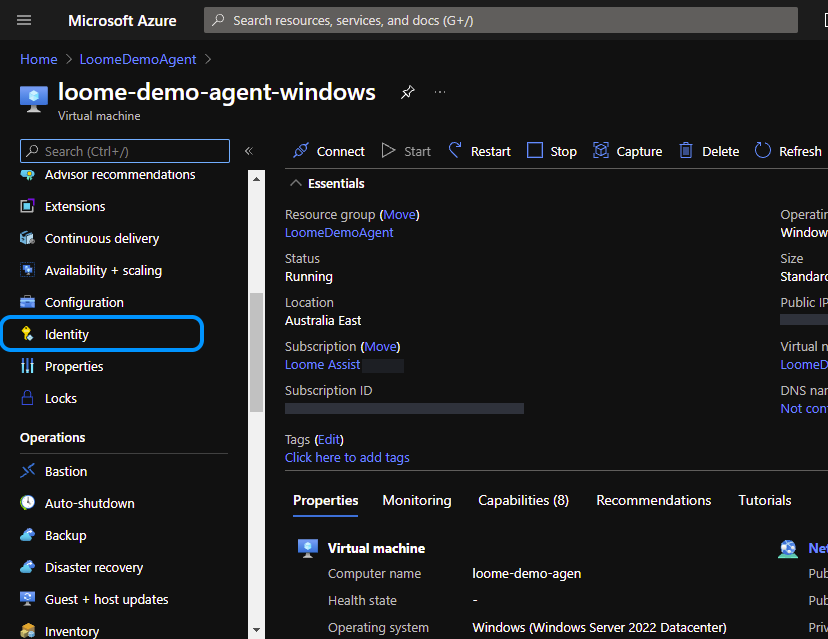
Locate the Identity menu option and click on it.
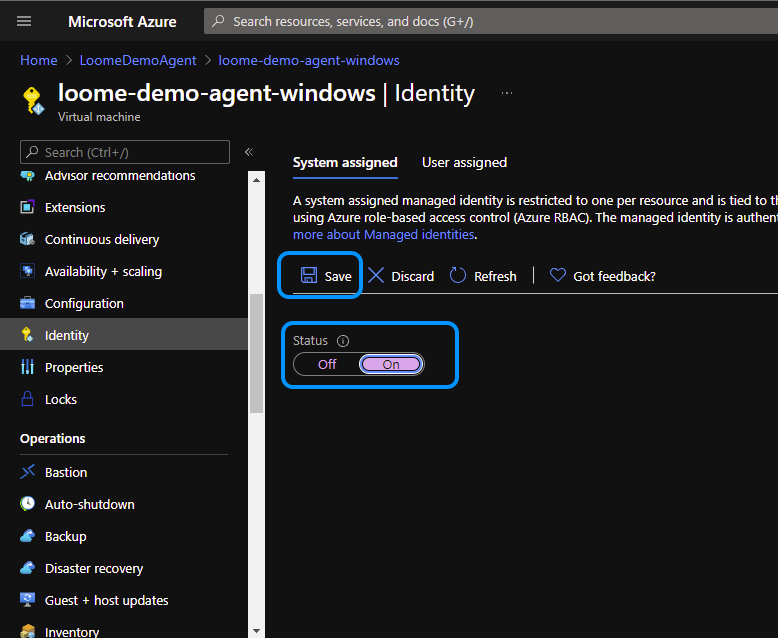
Under the System Assigned (preview) tab, click the On toggle for the Status.
Click the Save button above.
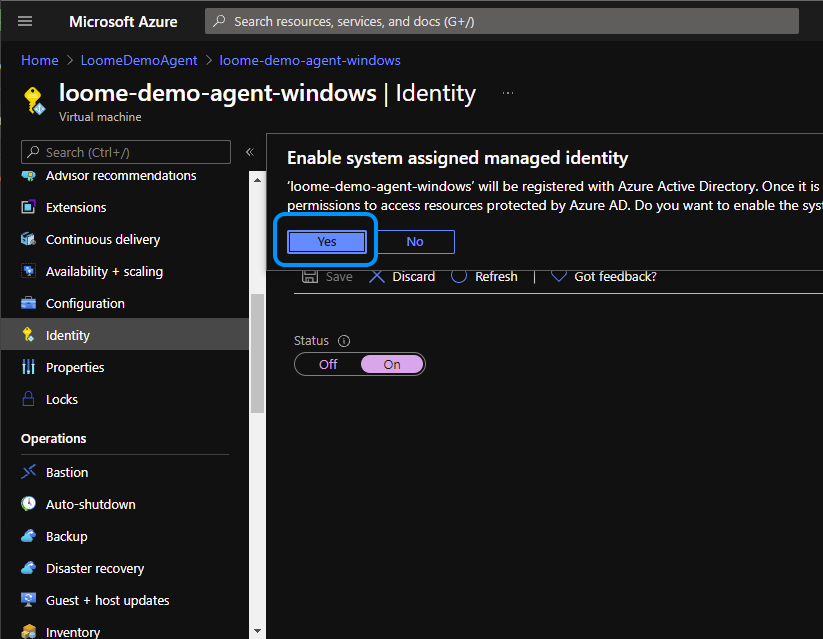
When prompted, click Yes to the confirmation.
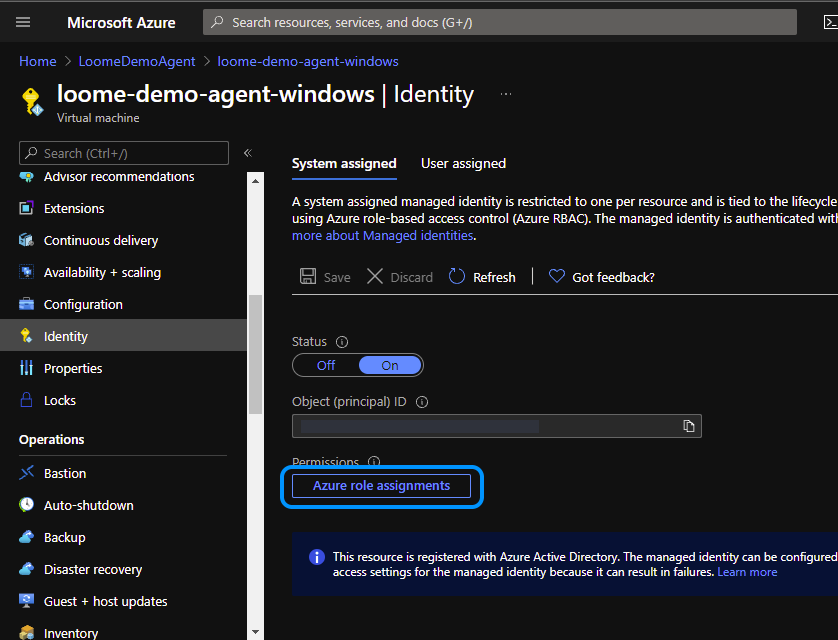
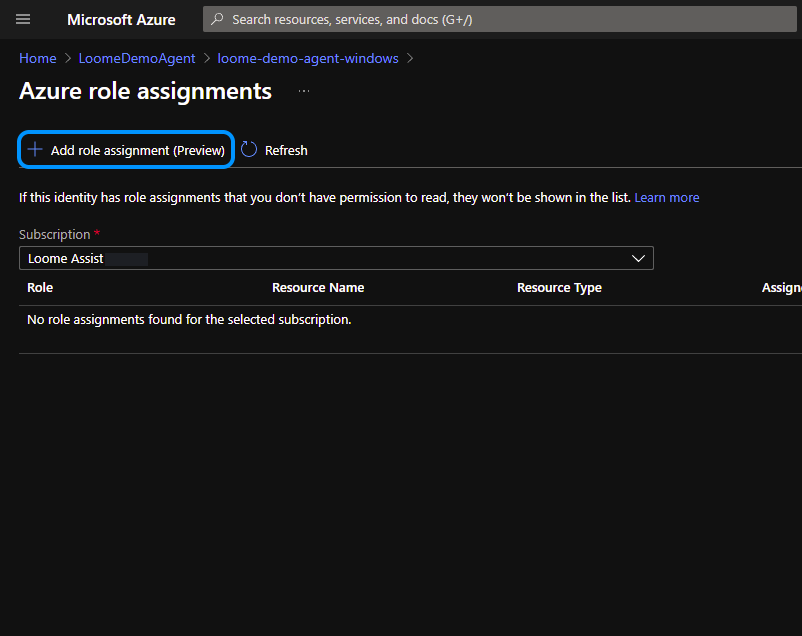
Now click on the Azure Role Assignments button.
Click the Add Role Assignment (preview) button to add a new Role Assignment.
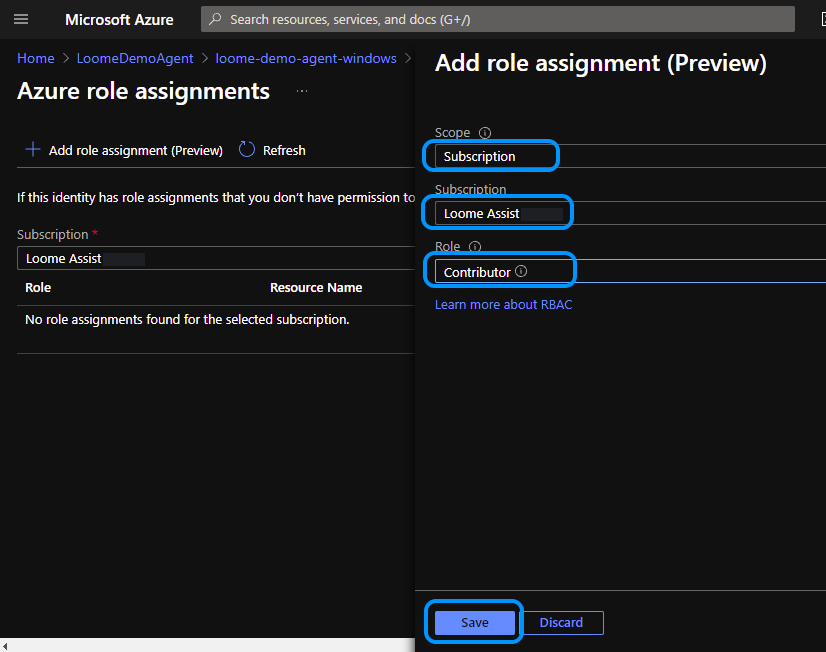
Select Subscription for the Scope, Select your Subscription, and then select Contributor for the Role.
Click Save to add this Role Assignment.
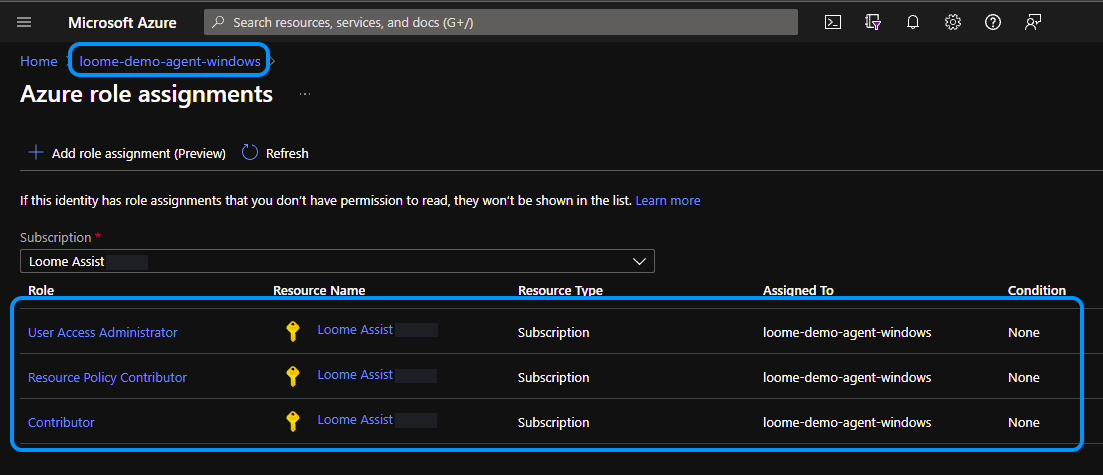
Repeat this step until you have all of the Roles in the below table assigned.
| Scope | Subscription | Role |
|---|---|---|
| Subscription | Your Subscription | Contributor |
| Subscription | Your Subscription | User Access Administrator |
| Subscription | Your Subscription | Resource Policy Contributor |
Your Role Assignments should look like this once completed.
Click on the Agent name near the top left of the screen.
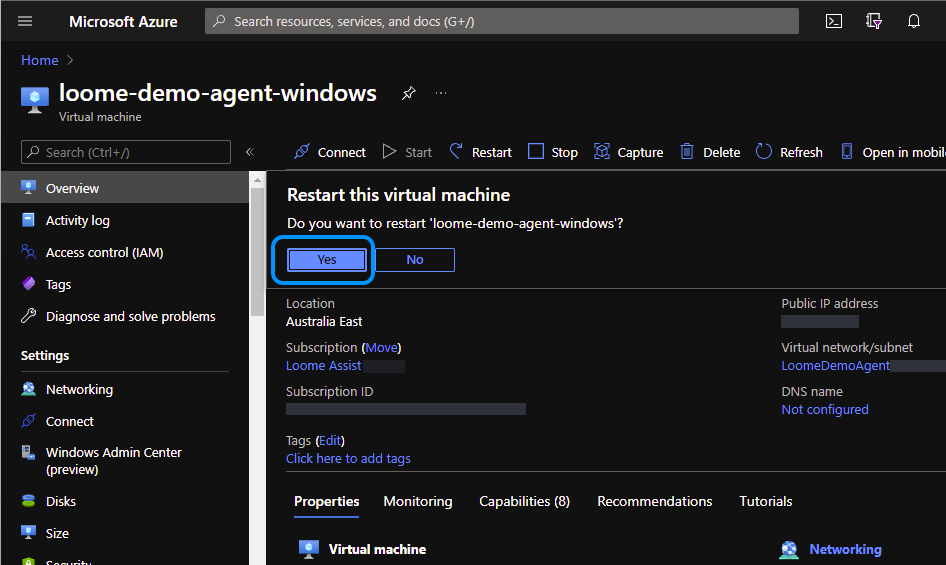
Now lets restart the Azure VM so the Agent can connect to Loome Assist.
Click on the Restart button near the top.
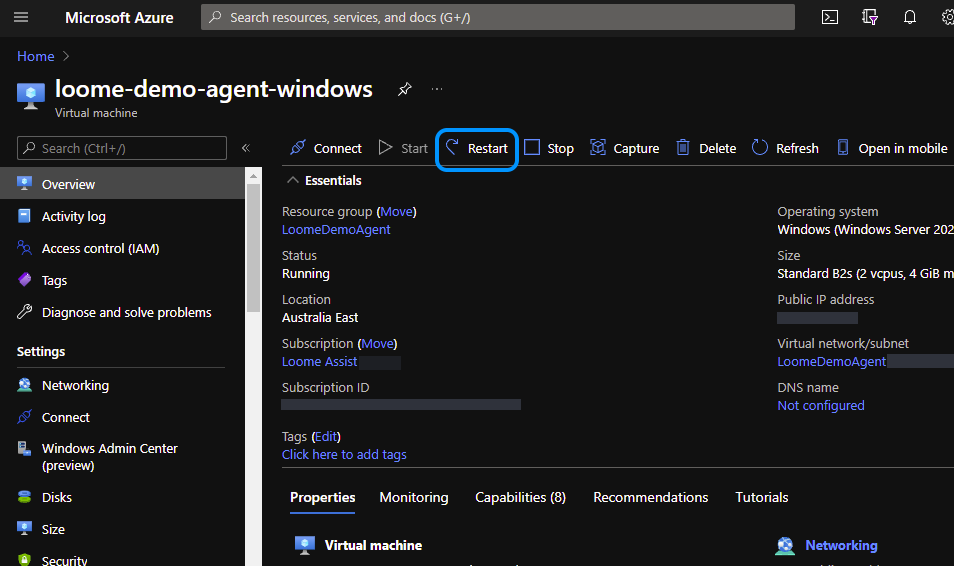
Click Yes to the confirmation message.
This process can take several minutes, you can remote in to the VM after 5 minutes and verify that the VM is running.
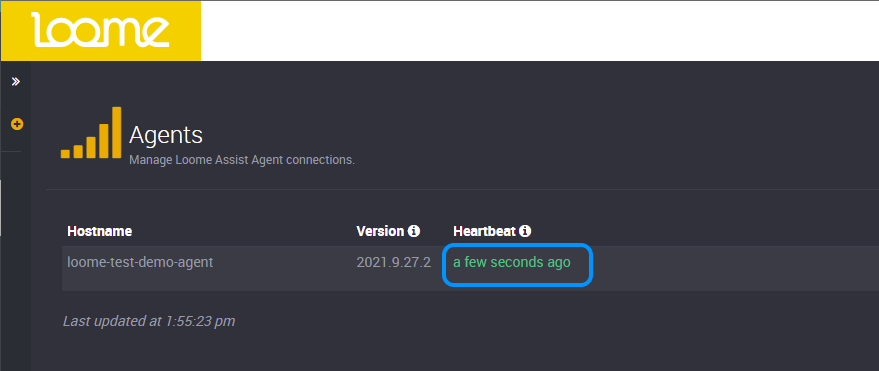
You should now be able to go back to the Loome Assist Agent page and confirm that the Agent is connected.
The Agent will display a green status if everything has been configured successfully.
Additional Agent Configuration
You can optionally configure additional agent settings based on your needs.
- If you wish to configure Microsoft Teams integration for Loome Assist, check out the documentation here.
- If you need to configure Firewalls, Proxies, or Anti Virus software then check out the Additional Agent Configuration.